Warwickshire

Limestone Floor Tiles Polished

Limestone Floor Tiles Polished

Limestone Floor Tiles Polished to a deep shine

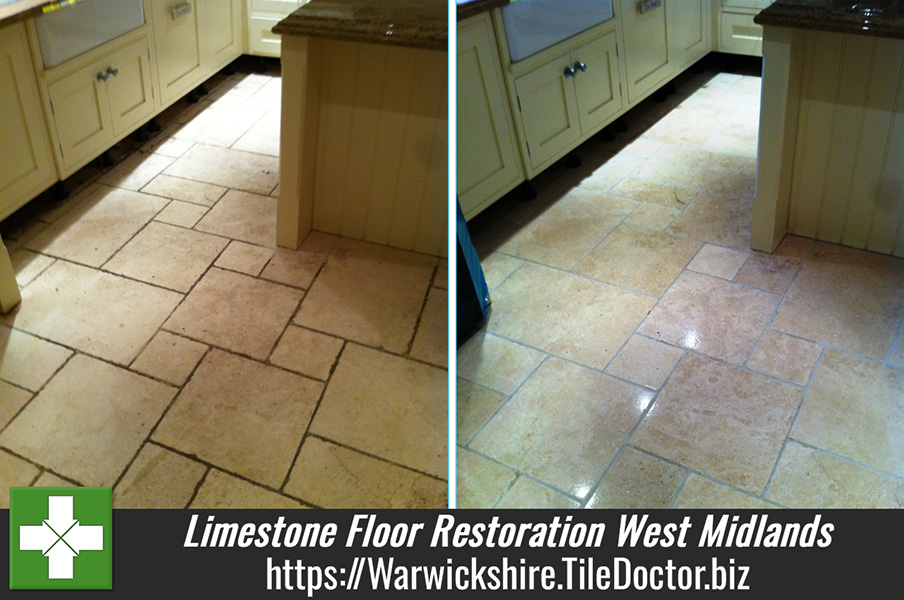
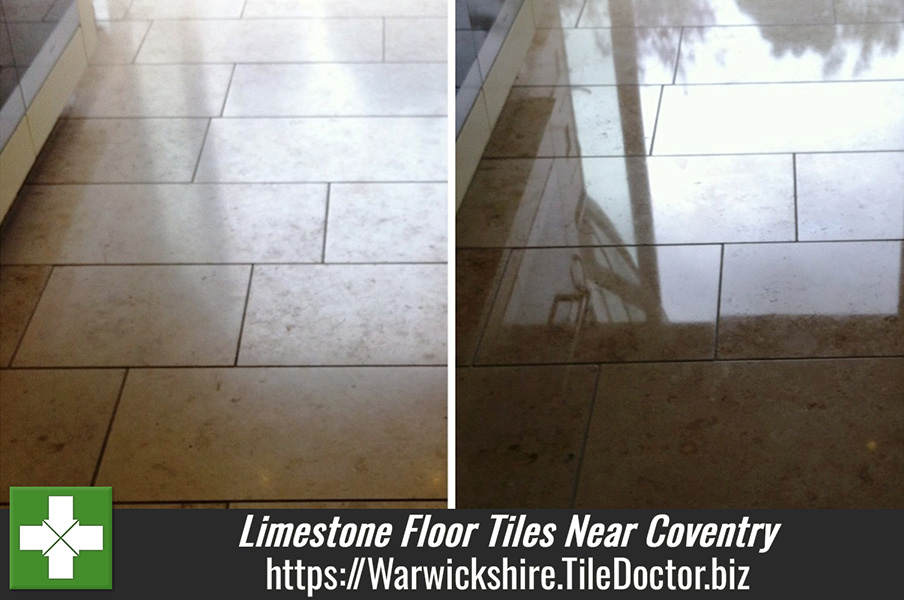
Great photograph below of a Limestone floor in the kitchen of a house near Coventry. The Limestone had lost it’s shine after the application of a surface sealing “Clean and Shine” type product; the problem was akin to the application of a wax finish which in turn had been contaminated with cleaning product and soil underneath. The grout line has also become heavily soiled through everyday use.

Cleaning Limestone Floor Tile

First the Limestone tiled floor was dry vacuumed to remove loose grit; we also took to opportunity to remove the kitchen unit kick boards. This was followed by a good clean with a 1:5 mix of Tile Doctor Pro-Clean which was left to dwell for 15 minutes before the application of a stiff grout brush on on the grout lines followed by the use of a slow speed buffing machine to break up the surface wax on the tile. The whole are was rinsed down using high pressure clean water via a spinner tool which removed any left over dirt from the grout lines.

The next step was to use the diamond encrusted burnishing pads system to prepare and condition the limestone floor tiles prior to polishing.

Before and After photos of a Polished Limestone Floor Tiles
Before and After

Adding that deep shine to Limestone Tiled Floors

We then applied Tile Doctor Shine Powder using a White buffing pad to provide that extra deep shine you can see in the photograph, it also provides and tough durable finish.

Limestone Tiled Floor Cleaning and Polishing

Limestone Floor Tiles Polished Read More »

Church Floor Cleaned and Sealed

Church Floor Cleaned and Sealed

Victorian Tile Floor Cleaning

Pictures below from St Gregory’s Church located in the village of Offchurch Warwickshire. The Victorian floor was laid in the 1800’s, there were signs of damage from acid based cleaning and high foot traffic in the central areas, no doubt from years of use from the parishioners.

Victorian Church Floor before tile cleaning
Victorian Church Floor before Tile Cleaning

Tile Cleaning

We used Pro-Clean (diluted 1 to 5 with water) applied with a mop to the floor area then using a floor buffing machine fitted with a nylon scrub brush we proceeded to agitate the solution whilst scrubbing the floor in order to break down the soil.

The dirty solution was then vacuumed off the floor using a wet and dry vac machine followed by rinsing with clean water at low pressure to remove any left over soil and product.

Victorian Floor Tile Sealing

Victorian Tiled Church Floor after Tile Cleaning and Sealing

The next day the floor had small areas still drying which was speed dried using fans and hot air. We then sealed the floor using three to five coats of Seal and Go depending on the area.

Victorian Tile Floor Cleaned and Sealed
Victorian Tile Floor Restored

Victorian Tiled Floor cleaning by Tile Doctor Warwickshire.

Church Floor Cleaned and Sealed Read More »

Triumph Club Slate Tile Cleaning and Sealing

Triumph Club Slate Tile Cleaning and Sealing

Slate Tile Cleaning and Sealing at the Triumph Working men’s club

It’s often difficult for a set of photographs to capture the difference cleaning and sealing a stone floor can make, however I think you will agree the photographs below which were taken at the Standard Triumph working men’s club in Coventry show an amazing transformation.

The slate floor had one coat of sealer put down by the tiler some ten years ago and due to the nature of the environment it had been covered in drink spills and the resulting cleaning products, overtime this had made floor sticky and dull.

Slate Floor before Tile Cleaning
Slate Floor before Tile CleaningSlate Floor Before Tile Cleaning  

Slate Tile Cleaning Process

The first step in the Slate Tile Cleaning process was to get it completely clean and free of any residual chemicals, we did this with the application of Tile Doctor Pro-Clean (a strong 1/2 mix with water) which we left to dwell for 15 to 20 minutes allowing it to chemically soak into pores of the slate tile. We then scrubbed the floor with a heavy weight floor buffer allowing the scrubbing action to break the soil down, we worked the soil and grout lines four square metres at a time, removing the soiled water with a wet and dry vacuum. The slate floor was then washed down with cold water applied at a pressure or 1200 psi with a special Spinner Tool. The whole tile cleaning process took around 8 hours to complete.

An inspection of the cleaned slate floor revealed ten years of wear and tear had resulted in a few holes which we repaired before leaving the floor to fully dry overnight.

Slate Floor After Tile Cleaning and Sealing
Slate Floor after Tile Cleaning and Sealing 

Sealing the Slate Tile

The next day we coated the floor with 5 coats of a Tile Doctor Seal and Go which is a water based sealer ideal for Slate floors that provides stain resistance and a durable low-sheen finish. Sealers do break down over time and given the high foot traffic over this floor we have agreed to go back once a year to provide a tile cleaning and sealer top up.

Triumph Club Slate Tile Cleaning and Sealing Read More »

Limestone Floor Restoration

Limestone Floor Restoration

Limestone Floor Restoration

Some photographs below of a Limestone floor in a property in the West Midlands. The property had just been sold and the new owners wanted the Limestone floor, which was heavy damaged from pets and the application of the wrong cleaning products, restored back to its original condition. Owners of stone floors really need to take care not to use acidic products to clean their floors as this slowly eats away at the stone; you get the same problem from pet urine which contains Uric acid.

Limestone floor before restoration by Tile Doctor Warwickshire
Limestone floor before restoration

I cleaned the floor using Tile Doctor Pro-Clean along with the diamond coated burnishing pad system and then sealed with Tile Doctor Colour Grow which is great for bringing out the colours in stone.

Limestone Floor After Restoration

After sealing we polished the floor with Tile Doctor Shine which is a crystallising powder that provides a very high deep shine and tough durable finish.

Limestone Kitchen Floor After Restoration

All in the entire Limestone Floor restoration took two long 12 hour days however our efforts were rewarded by the look on the faces of the new owners who were over the moon with the finished job.

Limestone Floor Restoration Read More »

Granite Worktop Leamington Spa

Granite Worktop

Adding Shine to a Granite Worktop

We don’t just clean tiled floors at Tile Doctor we also cover stone worktops including Marble and Granite. In the example below we were called to a customer near Leamington Spa who had tried a number of different products in order to achieve a glossy shine.

Granite Worktop showing a dull matt finish
Granite Worktop Before

We applied Tile Doctor Pro-Clean sprayed on to the work area to breakdown the previous products that had been applied.

Granite Worktop after being sealed
Granite Worktop After

The Granite worktop was high pressure steamed vacuumed and then left to dry before being sealed with an impregnating stone enhancer with extra darkening action which intensifies the natural colour and also masks defects and imperfections in the stone. The Granite was then buffed to get that real deep shine.

Granite Worktop Read More »

Scroll to Top