sealing victorian tiles

Vinyl Covered Victorian Hallway Floor Restoration Warwick

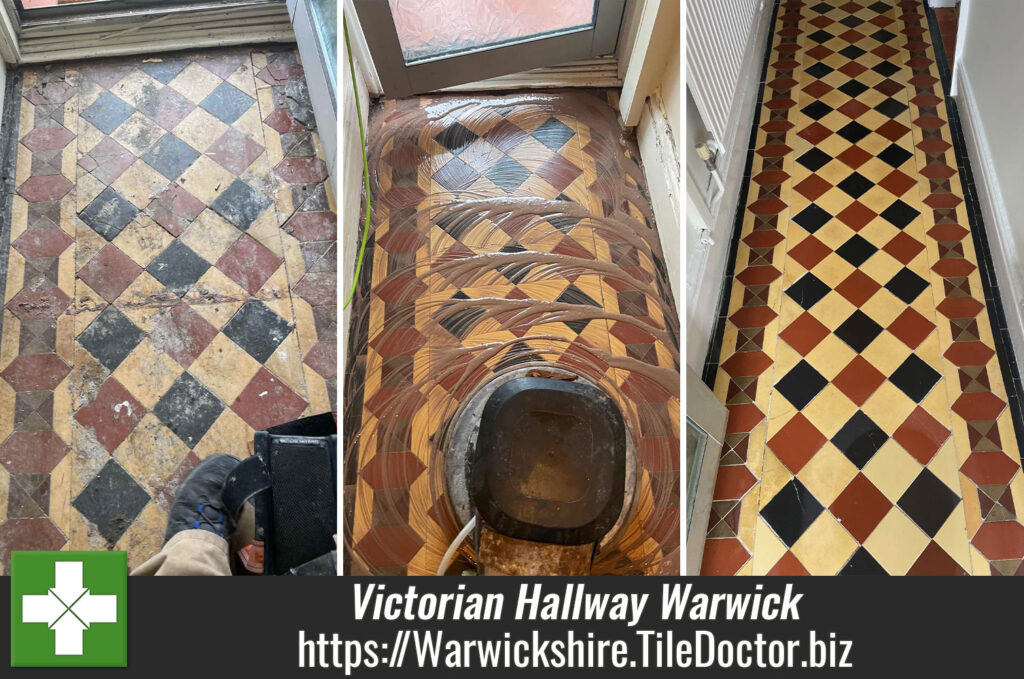
Victorian Hallway restoration in Warwick

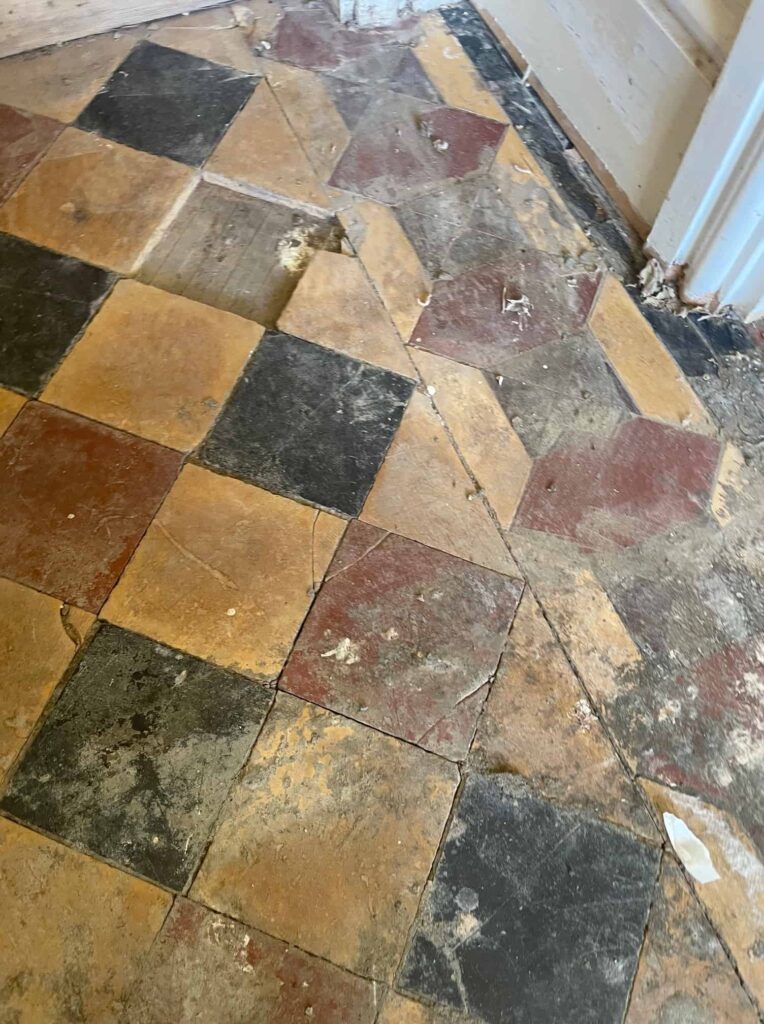
I took these photographs of an original Victorian tiled floor at a 1900’s house in Warwick, near the racecourse. The floor had been covered in vinyl for many years and had decided to replace it. However, after realising the value a restored period floor can add to a property, they investigated having it restored and consequently contacted Tile Doctor.
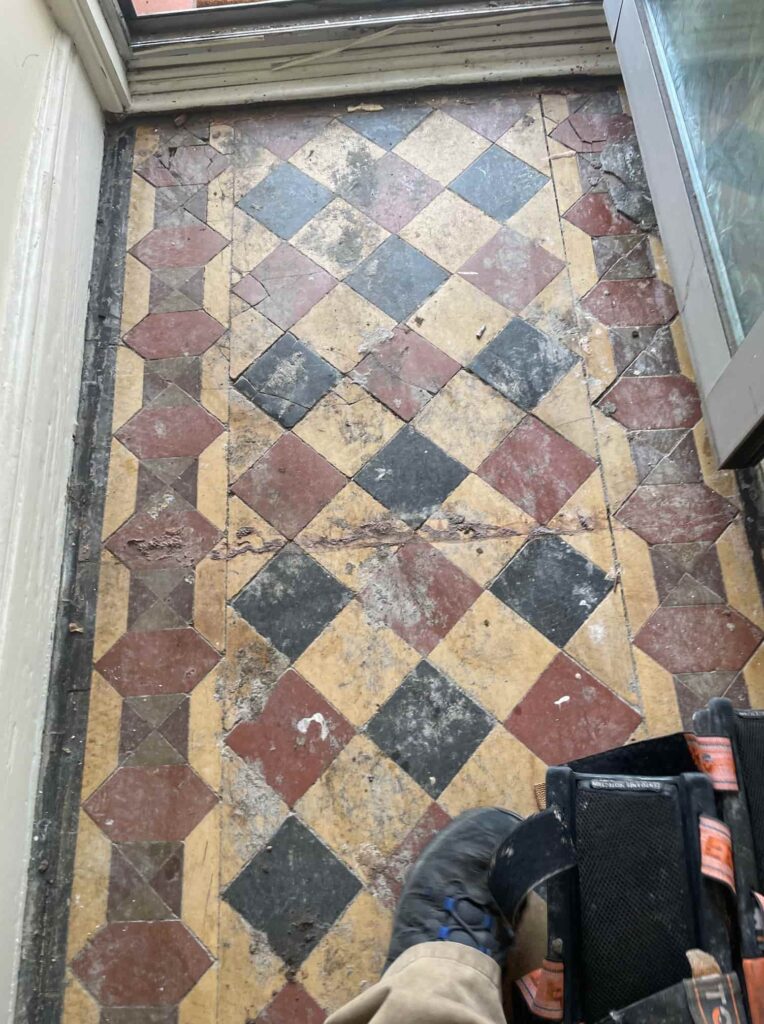
Vinyl Covered Victorian Floor Before Restoration Warwick Vinyl Covered Victorian Floor Before Restoration Warwick

Before quoting I went over to the house to survey the floor and work out what would be needed to renovate it. I could see that the main issues would be the self-levelling screed and adhesive that had been used to secure the vinyl. There were also numerous tiles that would need replacing. None of this concerned me though as I have worked through these sorts of issues many times before.
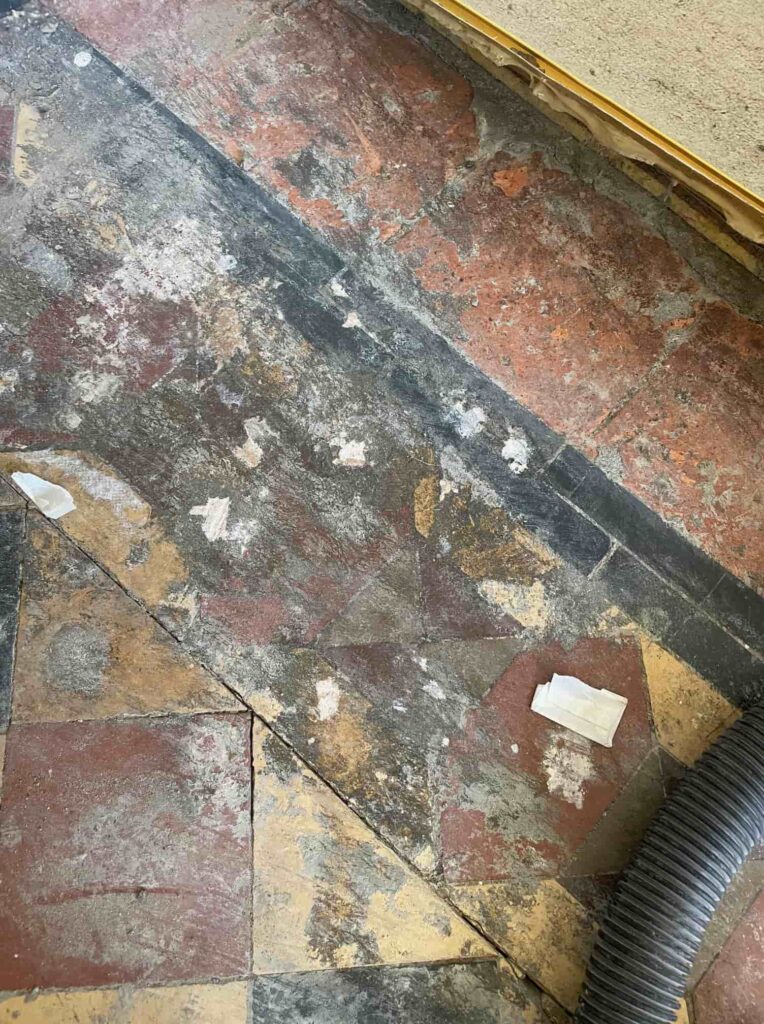
Vinyl Covered Victorian Floor Before Restoration Warwick

I reassured the client that the original floor could absolutely be restored back to its original condition and worked out a price for the work which would take two days, one to clean/repair, and one to seal. My quote was accepted, and a date was arranged for my return.

Cleaning and Repairing a Victorian Tiled Hallway Floor

Old floors like this one don’t have a damp proof membrane under the tiles so I was immediately concerned about increasing the moisture levels in the floor itself, especially as it was previously covered in vinyl which can prevent moisture rising through the floor. As a result, I decided to use as little water as possible when cleaning the floor by using low moisture gel cleaning products.

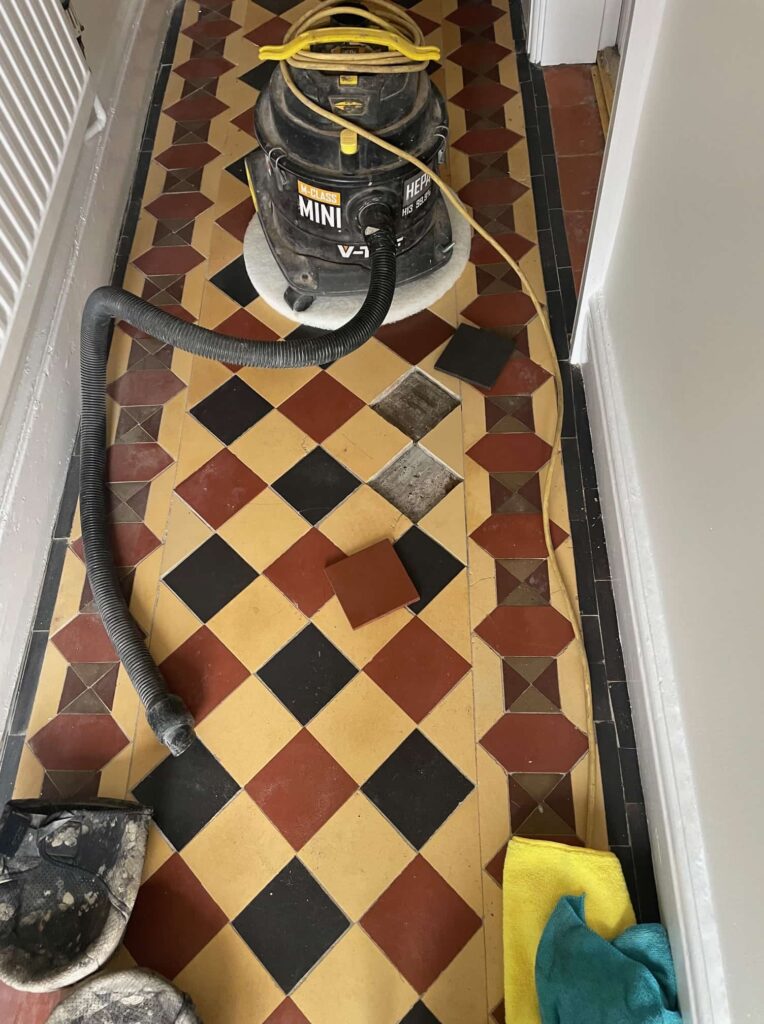
To remove the screed and adhesive I applied Tile Doctor Acid Gel to the floor and then left it to soak in for ten minutes before working it in with a 100 and then 200-grit abrasive pad. The acidic nature of the gel is really good at breaking down cement and mineral based contaminates allowing them to be removed more easily. After each pad I used a little water to help sluice away the soiled gel and extracted with a wet vacuum.
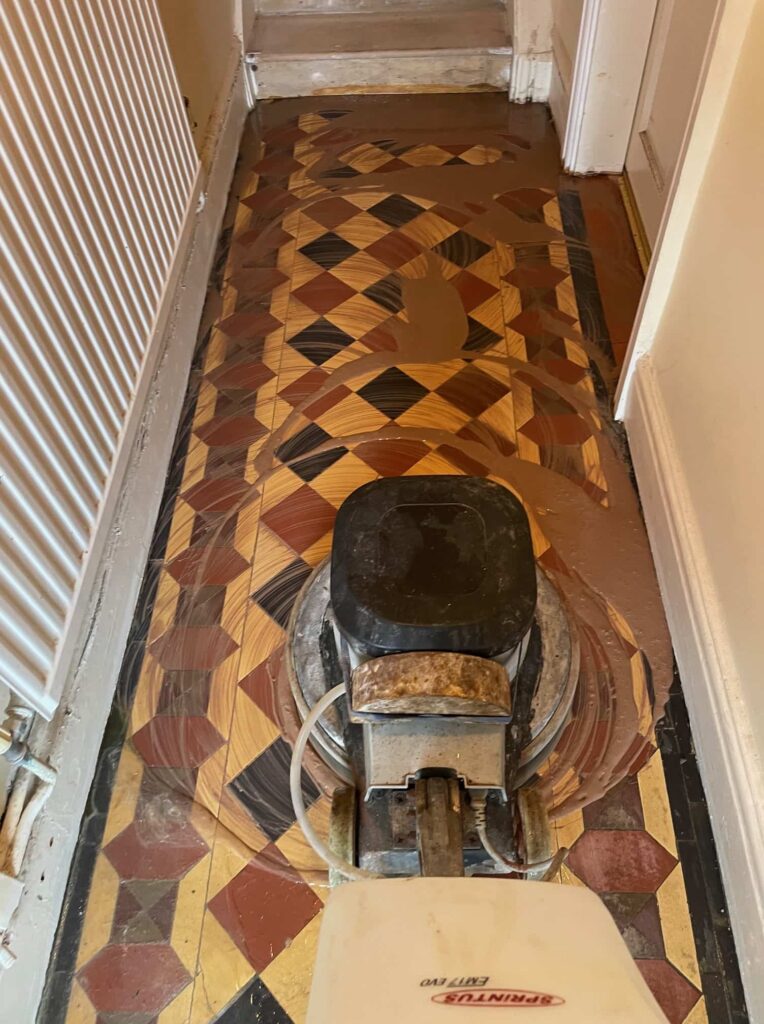
Vinyl Covered Victorian Floor During Restoration Warwick Vinyl Covered Victorian Floor During Restoration Warwick

After cleaning I then turned my attention to the 23 or so tiles that were either loose or in a bad condition and needed changing. These were carefully removed, and the foundation cleaned up before being replaced with a matching tile that I had managed to source earlier. The replacements were secured with fresh adhesive and then grouted. The floor was then given a quick clean and then left to dry out fully overnight.

Sealing a Victorian Tiled Hallway Floor

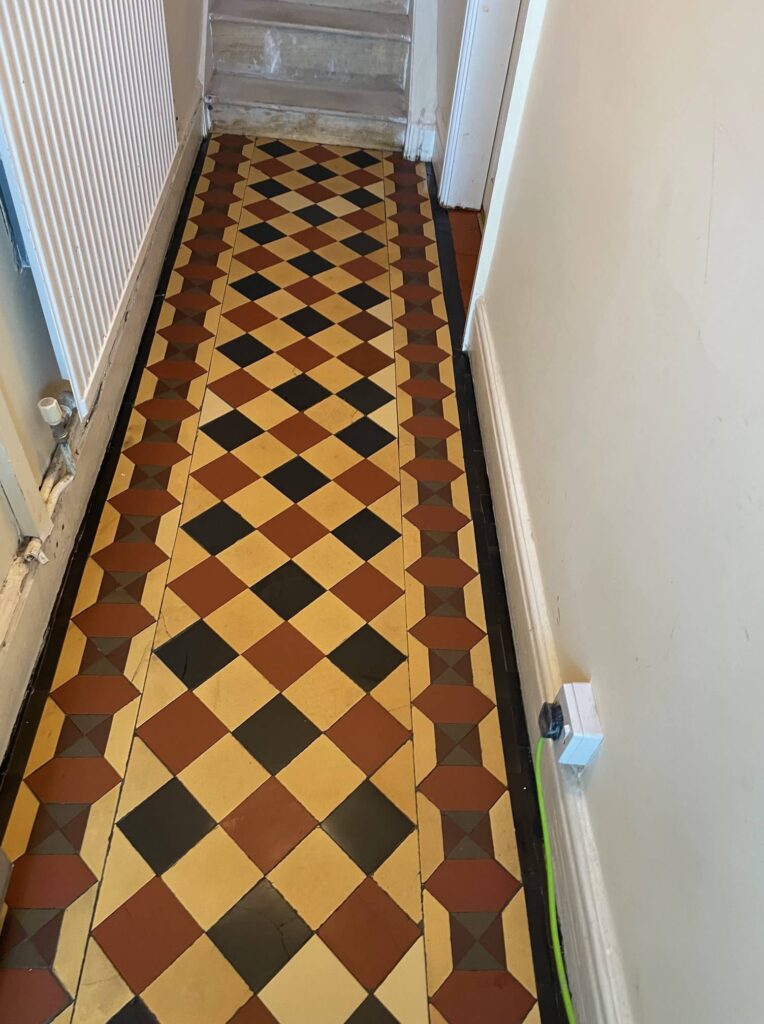
The next day I returned and sealed the floor with Tile Doctor Colour Grow which leaves a matt finish and contains a colour enhancing formula that really brings out the colours in the tile. Additionally Colour Grow is also fully breathable and will allow moisture to rise unhindered through the floor and evaporate at the surface, a crucial feature when sealing old floors like this one.
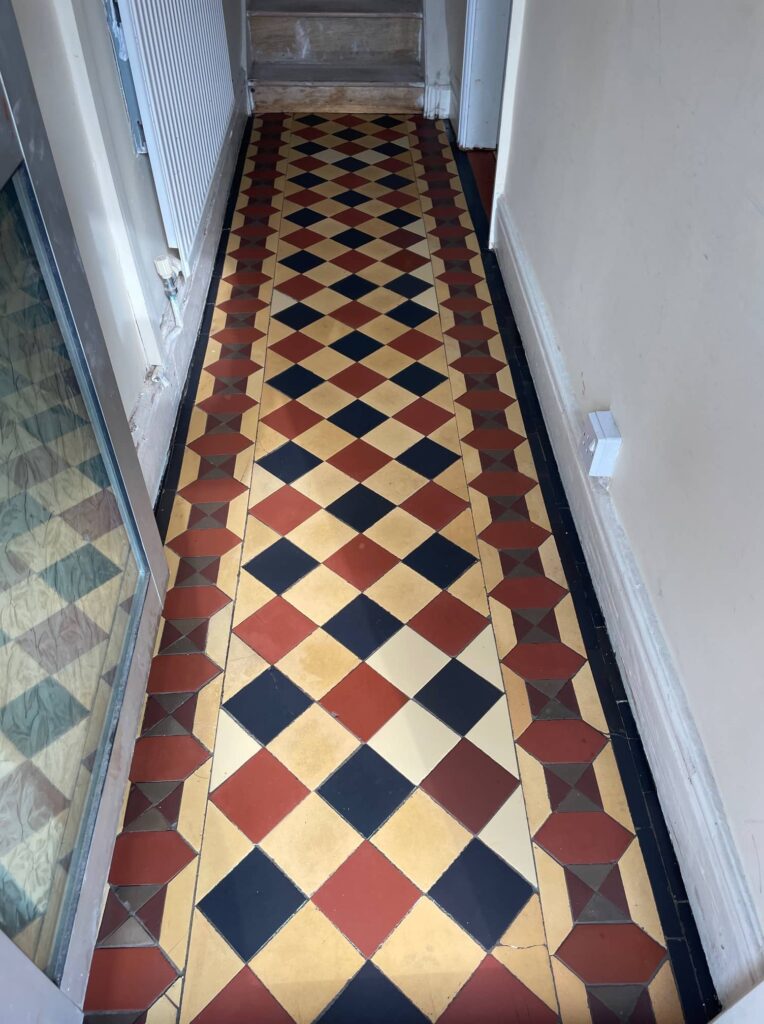
Vinyl Covered Victorian Floor After Restoration Warwick Vinyl Covered Victorian Floor After Restoration Warwick

For aftercare I recommended Tile Doctor Neutral Tile Cleaner which is an effective tile cleaner that is safe to use on sealed tiled floors.


Professional Restoration of a Victorian Tiled Hallway in Worcestershire

Victorian Hallway restoration in Warwick Read More »

Victorian Tiled Hallway Refreshed in Radford

Victorian Tiled Hallway Refreshed in Radford

This Victorian Tiled Hallway at a house in Radford near Coventry had been well preserved under a carpet for many years and the owners of the house now wanted it brought back to life. Physically the tiles were in good condition however they did suffer from the usual issues of paint splashes and adhesive stuck to the surface.

Victorian Tiled Floor Refresh Radford Before Victorian Tiled Floor Refresh Radford Before

Cleaning Victorian Tiles

To clean up the tiles and remove the paint and glue I used a dilution of Tile Doctor Remove and Go. The edges of the floor was done first as this was where the most pain splashes were to be found due to the skirting being painted at some point in the past. The usual procedure still applied allowing the product to soak in and soften the paint before being scrubbed off by hand. Once the edges were done I moved onto the main part of the floor using the same process however this time I had the advantage of being able to use a rotary machine fitted with a scrubbing pad. The dirty solution was rinsed away with water and removed with a wet vacuum.

To finish off and remove some signs of efflorescence (white salt stains) the tiles were then scrubbed in a dilution of Tile Doctor Grout Clean-Up. This did the trick but you can’t leave this product on the tiles for too long as its an acid so as soon as it had done its job it was washed off and then the tiles were then given a thorough wash down with clean water.

My work was done for the day so I left a fan running to help speed dry the floor overnight and left for the day.

Sealing Victorian floor tiles

I came back the next day to seal the floor using Tile Doctor Seal and Go sealer which provides stain protection as well giving a nice sheen to the tile, the tiles were quite porous and needed six coats before they were fully sealed.

Victorian Tiled Floor Refresh Radford After
 

Victorian tiled floor cleaned and sealed near Coventry

Victorian Tiled Hallway Refreshed in Radford Read More »

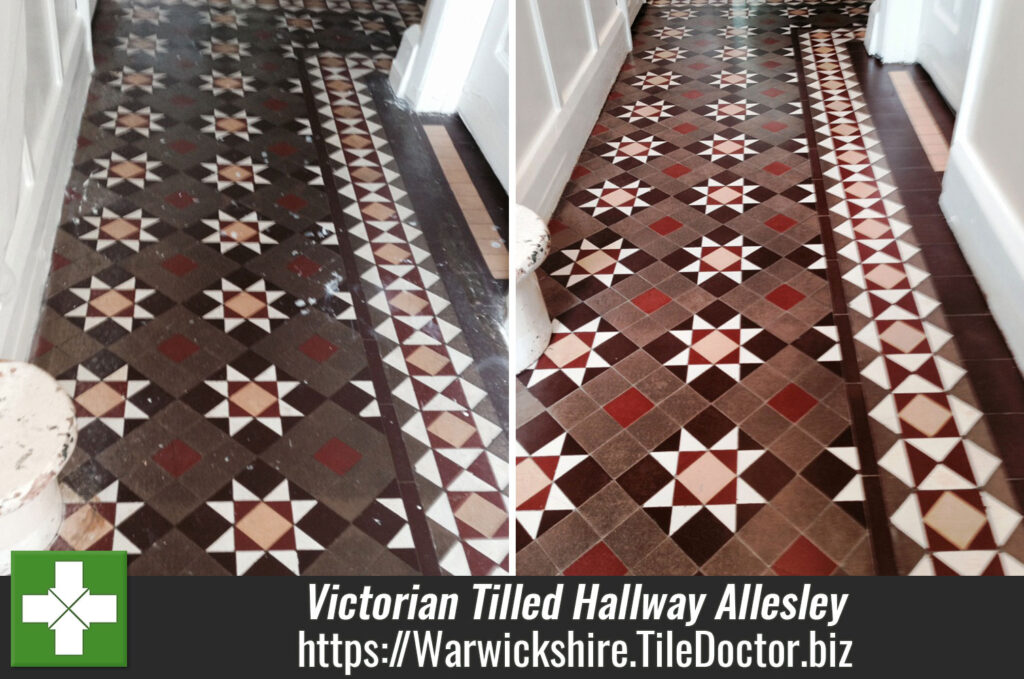
Victorian Tilled Hallway Refurbished in Allesley

Victorian Tilled Hallway Refurbished in Allesley

Popular as they are in the UK it wasn’t long before I was called back to refurbish another Victorian Tiled Hallway Floor this time in the town of Allesley near Coventry. This tiles were heavily soiled and had been splashed with paint from decorating, on top of this there was evidence of adhesive from when the floor had been previously covered in carpet and there were a number of damaged tiles that needed replacing.

Victorian Tiled Hallway Coventry Before Cleaning Victorian Tiled Hallway Coventry Before Cleaning

Cleaning Victorian Tiles

To get the tiles clean of paint and dirt I decided to go straight for a dilution of Tile Doctor Remove and Go which was left to soak into the tiles for around thirty minutes before scrubbing it in with a rotary machine fitted with a scrubbing pad. The dirty solution was rinsed away with water and removed with a wet vacuum and stubborn areas and grout re-treated with a scrubbing brush by hand.

I wasn’t entirely happy with the condition of the tiles at this stage so the next step was to scrub in a dilution of Tile Doctor Grout Clean-Up which is an acid based product that removed grout haze, mineral deposits, rust stains and efflorescence. This did the trick but being an acid based product you can’t leave it on the tiles for too long and so was washed off soon after and the tiles washed down with clean water.

I scraped out the grout surrounding the damaged tiles and lifted them out, I had already arranged replacements so once that was done and tidied up it was just a question of putting the replacement in place with tile adhesive and re-grouting using a sympathetic grout colour to match the aged existing grout.

My work was done for the day so I left a couple of fans running to help dry the floor and left for the day.

Victorian Tiled Hallway Coventry Drying

Sealing Victorian floor tiles

I came back the next day to seal the floor using Tile Doctor High Shine sealer which provides stain protection as well as a very shiny finish; five coats were needed to get it fully sealed.

Victorian Tiled Hallway Coventry After Cleaning and Sealing Victorian Tiled Hallway Coventry After Cleaning and Sealing


Victorian tiled floor deep cleaned, repaired and sealed near Coventry

Victorian Tilled Hallway Refurbished in Allesley Read More »

Scroll to Top