Leamington Spa Tile Cleaning

Leamington Spa Tile Cleaning

Welcome to my Work History archive where you will find examples of the cleaning and renovation of tiles carried out in Leamington Spa.

Limestone Floor Tile and Grout Renovation Southam

Soiled Limestone Floor Tile and Grout Renovated in Southam

Details below of an impressive Limestone Floor installed at a large county house in the historic market town of Southam. I had been asked to deep clean the limestone floor tiles and grout lines in the kitchen and adjacent hallway. They had been previously cleaned by another company a few years ago and they now needed doing again.
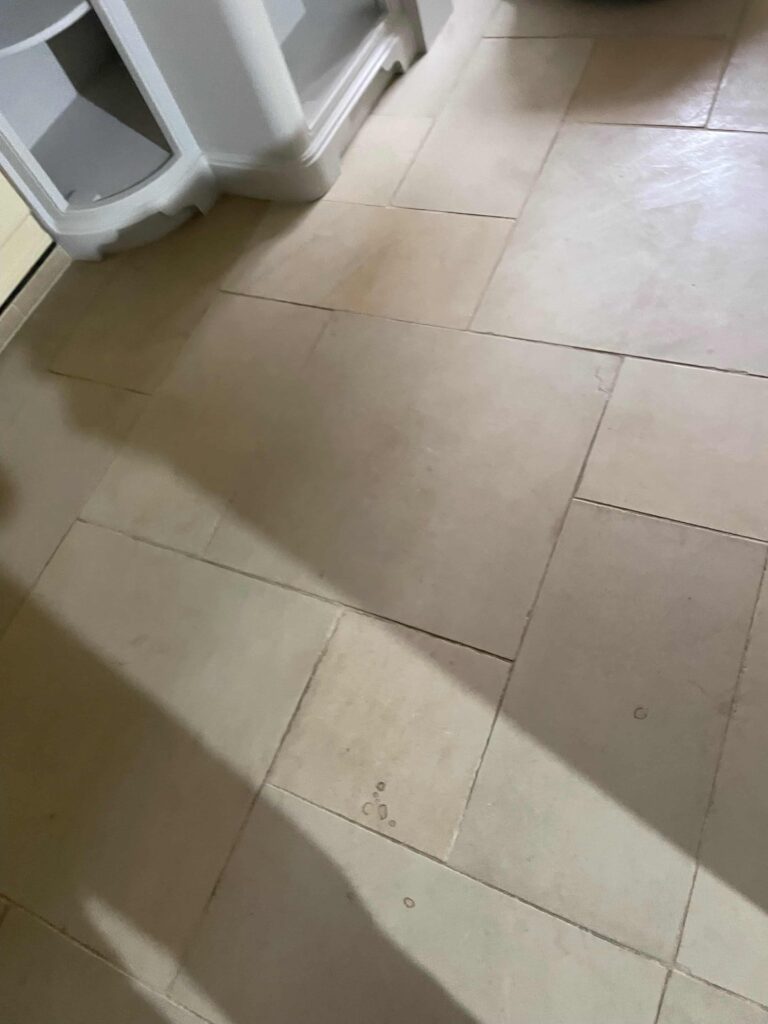
Limestone Floor Tile and Grout Before Cleaning Southam

I went over to survey the tiles and provide a quote as requested. The stone was dirty but in good shape, I could see the previous sealer had started to fail in the busiest areas and this was now letting dirt become trapped in the pores of the stone. The main problem though was the grout which had a very rough surface and was heavy contaminated with acrylic sealer.

Limestone Floor Tile and Grout Before Cleaning Southam Limestone Floor Tile Grout Before Cleaning Southam

Cleaning and Burnishing Limestone Tiles

Before beginning the work, I took the precaution of adding a clear silicone sealant between the kitchen units and tile. This is needed to prevent any water used during the cleaning process from soaking into the woodwork and damaging it.

Limestone Floor Tile and Grout During Preparation Southam

Once that was done work started on talking the grout which had to be rubbed back using handheld diamond blocks which was able to cut through and remove the acrylic sealer and dirt along with it. All the grout lines had been treated in this way and so realising it was going to be a tough job I had arranged for Steve Carpenter from Nottinghamshire Tile Doctor to lend me a hand for two days.

After resolving the grout issues, I moved on to restoring the appearance of the Limestone tiles themselves. This was done coarse diamond encrusted Burnishing Pads. Each pad has a different level of grit to grind away the dirt from the stone and build up the polished appearance. The process effectively resurfaces the stone leaving it looking new and fresh.

The process started with the application of a coarse 200-grit pad, fitted to a rotary machine, to grind away any excess muck and sealant lubricated with a little water and Stone Soap cleaning fluid. The resultant slurry was rinsed away and I followed up with the application of the 400-grit pad again with a small amount of water and Stone Soap.

Sealing Limestone Tiles

The last step was to seal the floor and after discussing this with the owner previously it was clear they wanted the Limestone to keep its light appearance and look as natural as possible. With that requirement in mind, we sealed the floor using a couple of coats of Tile Doctor Ultra Seal which is a premium impregnating sealer that is almost invisible and doesn’t alter the look of the stone. It works by soaking into the stone, occupying the pores, and thereby preventing dirt from becoming lodged there, this keeps the dirt on the surface where it can be easily cleaned away. Ultra-seal is also an excellent grout sealer.

Limestone Floor Tile and Grout After Cleaning Southam Limestone Floor Tile and Grout After Sealing Southam

After three days of hard work by the team working the Limestone and Grout was looking so much better and was a massive improvement. The new sealer will also ensure the stone and the grout is much easier to maintain going forward.

Limestone Floor Tile and Grout After Cleaning Southam Limestone Floor Tile and Grout After Cleaning Southam


My customer was very happy with the floor and pleased it would be easier to clean from now on. Regarding cleaning, I recommended they use Tile Doctor Stone Soap which is a gentle yet effective tile cleaner that won’t impact the sealer.


Professional Cleaning of a Limestone Tiled Floor in Warwickshire

Soiled Limestone Floor Tile and Grout Renovated in Southam Read More »

Rejuvenating a Slate Tiled Bar Area at a Pub in Leamington Spa

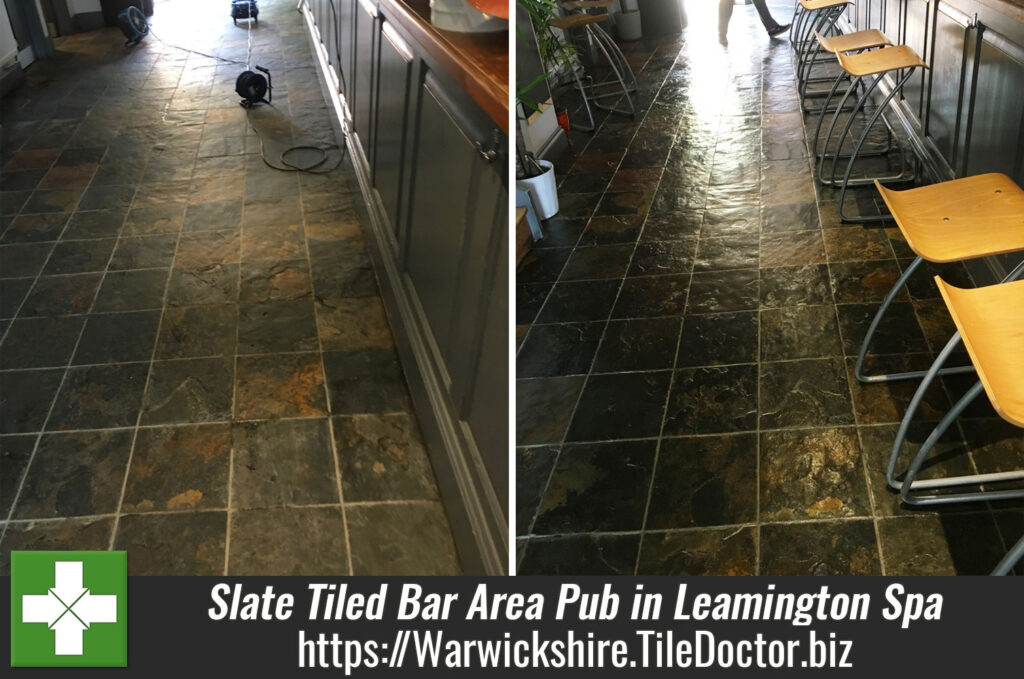
Rejuvenating a Slate Tiled Bar Area at a Pub in Leamington Spa

The Drawing Board is a Gastropub and bar in Leamington Spa with a fantastic homely aesthetic. Leamington Spa itself is a spa town in Warwickshire, home to The Royal Pump Rooms, the most famous of the spa baths that were opened in England in the late-18th and mid-19th centuries.

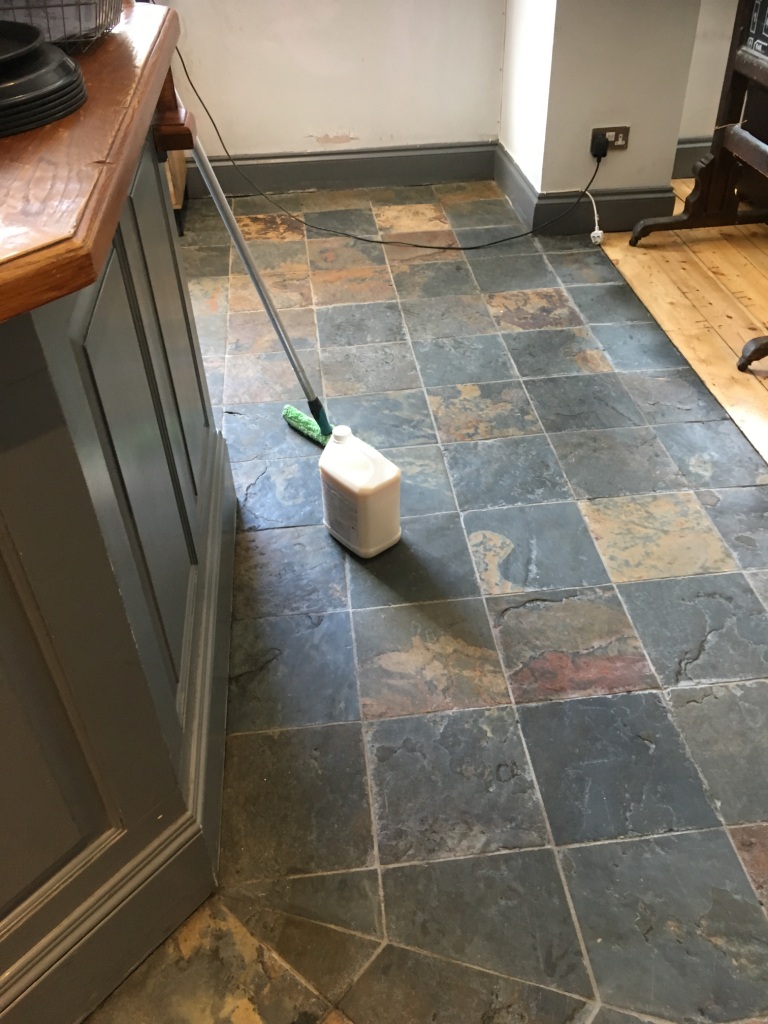
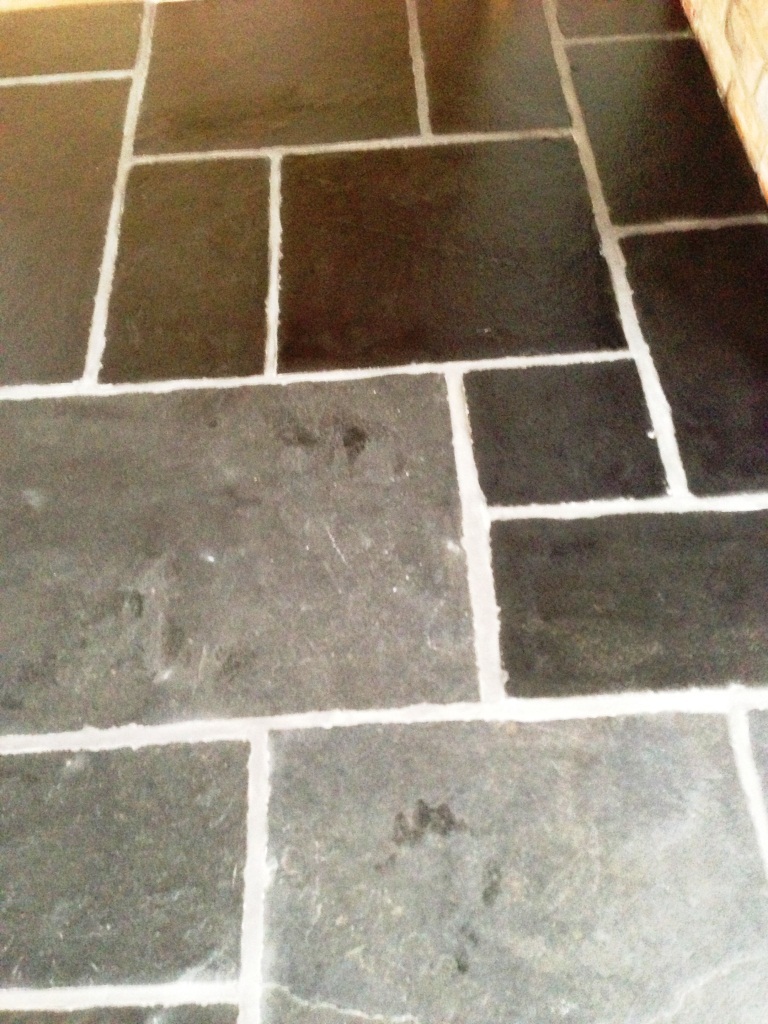
Slate Tiled Floor Before Restoration in Leamington Spa Pub Restaurant
I have eaten at the Drawing Board a few times in the past (great food!) and was really pleased to help the owner rejuvenate the Slate tiled floor in the bar area. He wanted the area cleaned and sealed to achieve a wet-look finish, however, because the pub is very popular amongst customers, I would only have a period of five hours to undertake the work. This meant an early morning start. I had carried out some maintenance work on the floor about 18 months ago, but during this time it had suffered a lot of foot traffic.

Slate Tiled Floor Before Restoration in Leamington Spa Pub Restaurant

Cleaning and Sealing a Slate Tiled Floor in a Bar Area

To begin, I used our product called Tile Doctor Oxy-Gel, which is an effective cleaner and coatings stripper, to remove the old acrylic coat on the tiles. Being in a gel form it’s easy to manage and holds in position allowing it to dwell on the stone and get to work on breaking the existing sealer down. Once applied it was left to soak into the Slate and then scrubbed in using a buffing machine fitted with a black scrubbing pad. The floor was then rinsed with water and the now soiled Oxy-Gel and water was removed with a wet vacuum.

With the tiles stripped of any remaining coatings, I turned my attention to the deep cleaning the grout lines with Tile Doctor Pro-Clean, which is a strong alkaline cleaner. The product was diluted with water and then scrubbed in manually using a stiff brush.

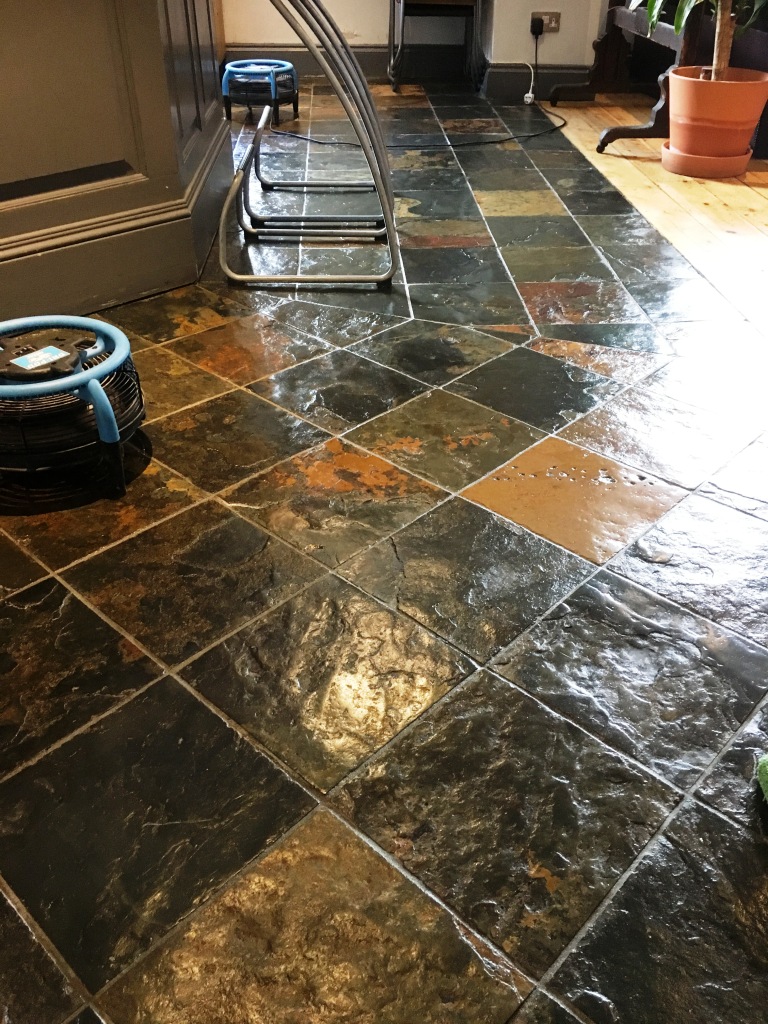
Following this, I rinsed the whole floor with fresh, cold water to remove any traces of product. Air movers were then installed to speed dry the stone as I needed to move quickly with only five hours to get the job done.

Once the floor was completely dry, I was able to seal it using two coats of Tile Doctor High Shine, which is a a specially formulated water-based blend of acrylic polymers designed to protect and enhance the appearance of natural stone whilst leaving a high sheen finish. Another advantage of the sealer is that being water based it leaves no smell as it dries which was important as being a pub we didn’t want to put the customers off.

Slate Tiled Floor After Restoration in Leamington Spa Pub Restaurant
I think you will agree the Slate floor looks significantly better and the new sealer will provide them with the protection they need to withstand heavy foot traffic. The owner of the pub was very pleased indeed!

Slate Tiled Floor After Restoration in Leamington Spa Pub Restaurant
 

Commercial Natural Stone Floor Maintenance at a Leamington Spa Public House

Rejuvenating a Slate Tiled Bar Area at a Pub in Leamington Spa Read More »

Linoleum Covered Quarry Tiled Floor Restored in Marton, Warwickshire

Linoleum Covered Quarry Tiled Floor Restored in Marton, Warwickshire

Recently I was called to a house in the very small town of Marton in Warwickshire which is known for its proximity to the medieval “Marton Bridge”, which lies just to the north, crossing the River Leam.

The entire downstairs flooring of my client’s house consisted of Quarry tiles apart from one room where the tiles had been covered by screed and then linoleum. Quarry tiles are a classic hard wearing tile used for both internal and external commercial and residential flooring due to its ability to withstand heavy usage. Reception areas, outdoor patios and porches, for example, are commonly tiled using Quarry.

My client wanted to restore the covered floor back to its original state so that it would match the rest of the downstairs. Realising that this would be a complex and physically demanding task, my client decided to call in Tile Doctor to carry out the restoration.

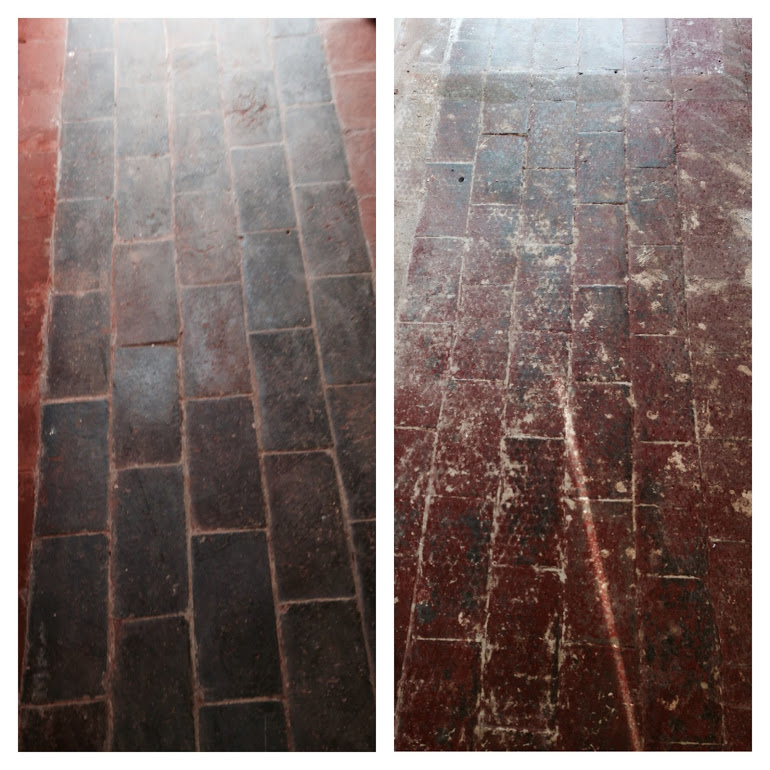
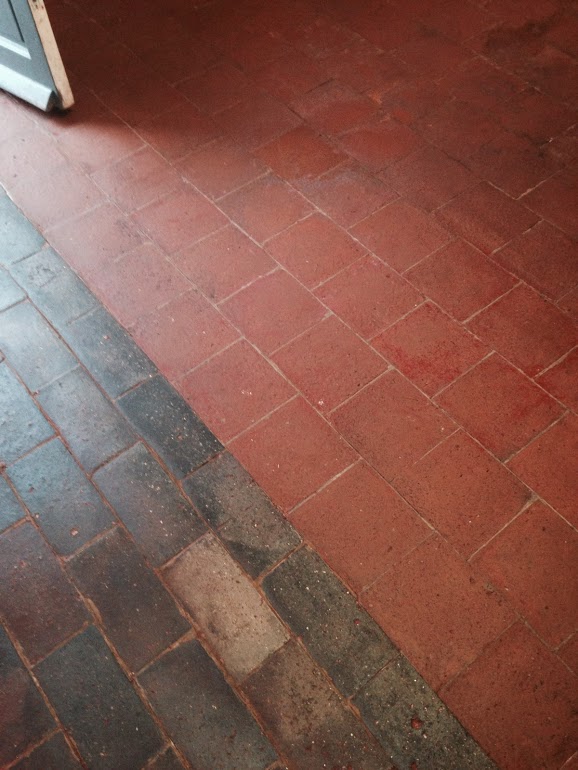
Quarry tiles covered in screed Marton before restoration Quarry tiles covered in screed Marton before restoration

Removing Screed and Linoleum from a Quarry tiled floor

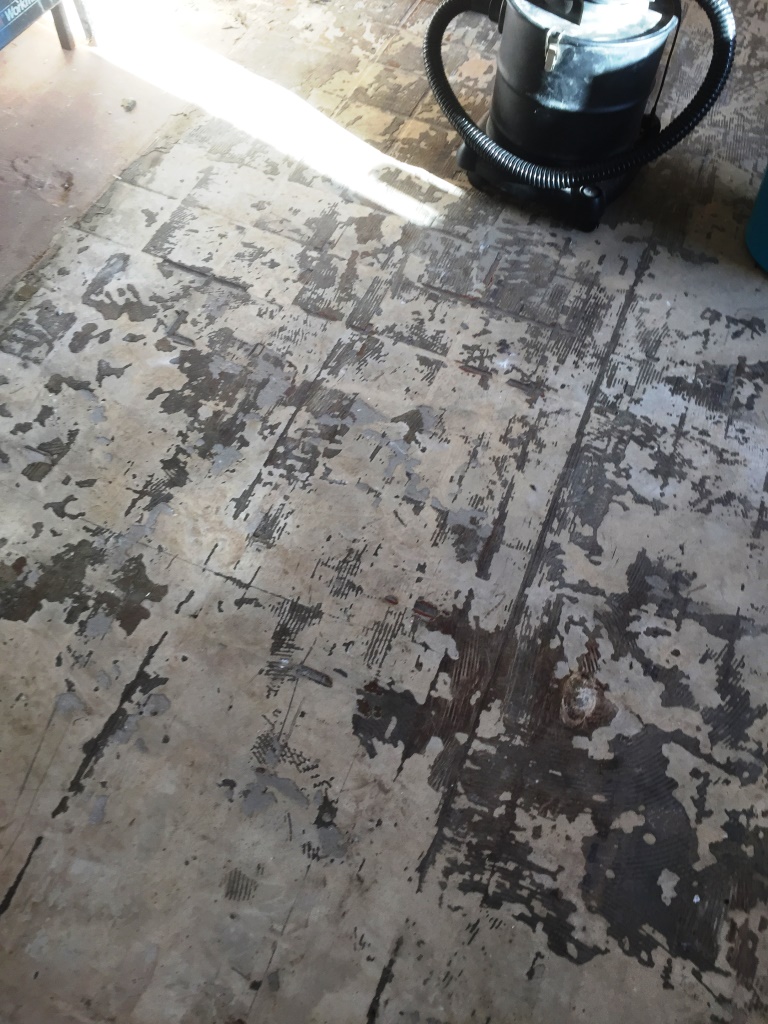
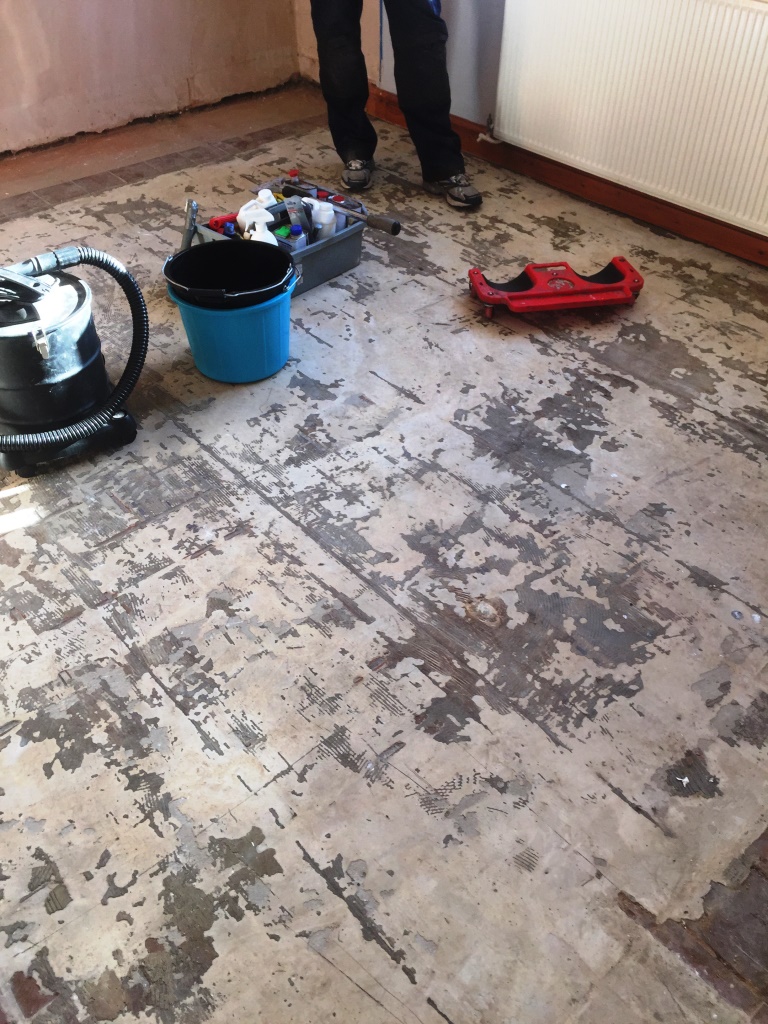
Removing the Linoleum covering was a relatively straightforward process, so I was able to do this relatively quickly. The main issue concerned removing the screed, which is far more difficult to remove, requiring a lot of physical scraping. Thus I opted to call in some extra manpower in the form of the Nottinghamshire Tile Doctor, Steve Carpenter. With the two of us armed with scrapers we set about removing the screed, taking extra care not to damage the Quarry tile underneath.

Quarry tiles covered in screed Marton during restoration

Cleaning a Quarry tiled floor

Once Steve and I had scraped off as much of the screed as physically possible, I applied a strong dilution of Tile Doctor Remove & Go, a stripper with cleaning properties that is particularly effective at breaking down coatings such as adhesives, plasters and sealers. The product was left to dwell for ten minutes before I worked it into the stone with a scrubbing pad.

After cleaning the tiles, I noticed a layer of grout haze on the surface of the exposed Quarry tiles, so I applied Tile Doctor Grout Clean-Up to remove it. Once the cleaning process was complete I gave the floor a thorough rinse with clean water, before soaking up the resulting residue with a wet-vac machine. The first day of work was a gruelling 12 hours long, but I was very pleased with the results and left the floor to dry overnight.

Sealing a Quarry tiled floor

On day two I returned to finish the job by sealing the newly uncovered Quarry tiles, but not before using a damp meter to check that they were completely dry. Any excess moisture left on unsealed tiles can potentially effect the performance of any sealers that are applied. I sealed the tiles using Tile Doctor Colour Grow, an impregnating, colour-enhancing sealer which gave the surface an aesthetically pleasing shine, as well as durable protection against dirt and wear for the future.

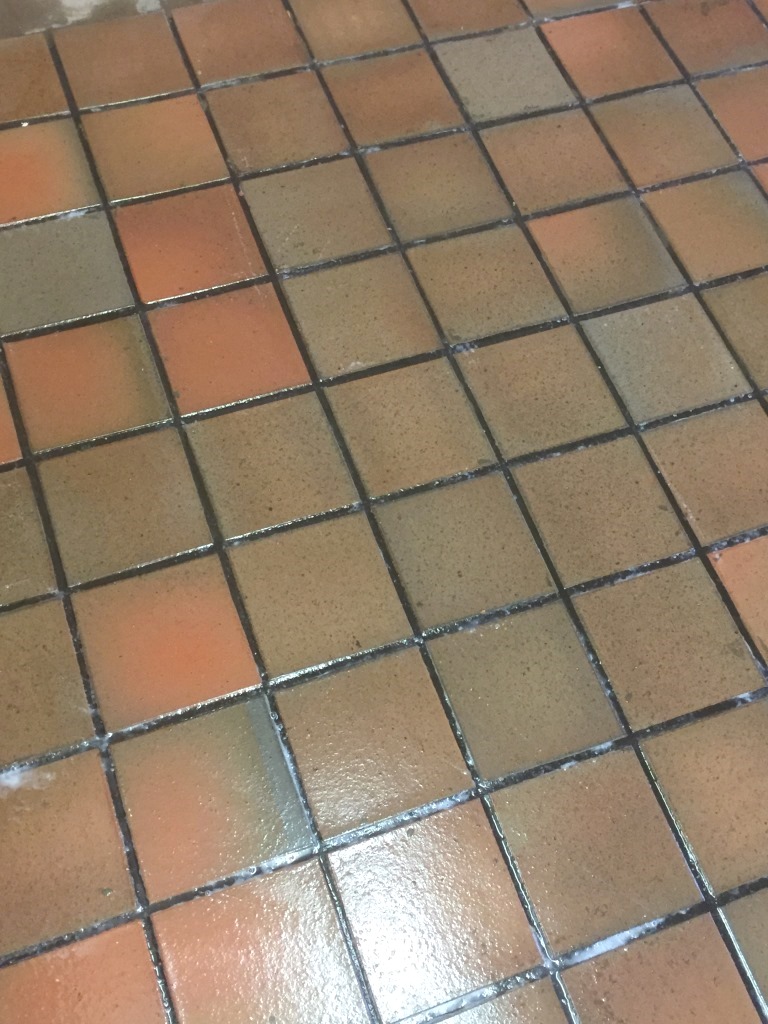
Quarry tiles covered in screed Marton after restoration Quarry tiles covered in screed Marton after restoration

After two long days of work the job was done and the transformation was fantastic and highly rewarding to see, the house now has a fantastic looking Quarry tiled floor running throughout the entirety of the lower level.

Quarry tiled floor restoration in Warwickshire

Linoleum Covered Quarry Tiled Floor Restored in Marton, Warwickshire Read More »

Quarry Tiled Floor in Long itchington After Cleaning and Sealing

Cleaning Painted Quarry Tiles in Long Itchington

Details below of a Quarry tiled floor that we treated in Long Itchington which had previously been painted with an epoxy paint designed for garage floors. Not the best product for maintaining the natural look of Quarry Tiles.

Quarry-Tiled-Floor-in-Long itchington-Before-Cleaning

Cleaning Quarry Tiles

To get the paint off the floor had to be soaked in a dilution of Tile Doctor Remove and Go which is a coatings remove and can pretty much remove anything from tiles. This was left to work on the tile before being scrubbed in using a rotary machine fitted with a black scrubbing pad. The grout also needed attention and this was also scrubbed this time by hand using a stiff brush along the grout line and more https://www.tiledoctor.co.uk/shop/item.aspx/tile-doctor-remove-go-1-litre/17/. The resultant soiled solution was removed using a wet vacuum and the floor washed down.

There were some stubborn stains so further work continued this time using Tile Doctor Grout Clean-up which is a stronger acid based product ideal for removing grout smears from tile, paint and even rust. Following this the solution was removed as before and the tiles given a thorough rinse to ensure no products were left on the floor and then left to dry overnight.

Quarry-Tiled-Floor-in-Long itchington-Before-and-after-Cleaning

Sealing Quarry Tiles

The floor had dried when we returned the next day so we set about sealing it using three coats of Tile Doctor Colour Grow which provides surface stain protection to the quarry tile and grout and also has a special formula that brings out the colour in the tile.

Quarry-Tiled-Floor-in-Long itchington-After-Cleaning-and-Sealing
 

Cleaning a Quarry Tiled Kitchen Floor in Long Itchington

Cleaning Painted Quarry Tiles in Long Itchington Read More »
Slate Floor Restored Final

Restoring a Kitchen Slate floor in Royal Leamington Spa

This Slate tiled kitchen floor at a house in Royal Leamington Spa needed a full clean and seal plus some of the tiles were reclaimed having been used originally outside and as well as loosing colour were suffering from salt damage.

Slate Floor Restoration Before

Cleaning Slate Tiled Flooring

To remove the sealer, clean the floor and tackle the salt damage the floor we used a 50/50 mix of Tile Doctor Pro-Clean and Nanotech Ultra-Clean worked into the floor with a buffing machine fitted with a black scrubbing pad. This product combination creates a powerful cleaning solution with Nano sized abrasive cleaning particles that’s ideal for cleaning difficult floors. It’s also very good for cleaning up grout however I find that’s best tackled manually using a stiff brush.

The next step was to remove the salts from the floor, this problem is more commonly known as efflorescence and results in white salt deposits being left on the surface of the tile, the only way to remove it is with an strong acidic cleaner such as Tile Doctor Grout Clean-Up, you do need to be careful not to allow it to dwell too long as it can damage the tile surface.

Last step in the process was to remove the soiled cleaning solution with wet vacuum and then wash down the whole floor with clean water in order to neutralise it before sealing. We have invested in a powerful indoor spinner tool for this purpose which is a fantastic product that applies and removes water under high pressure. We then left the floor so it could dry overnight.

Slate Floor Restoration Cleaned

Sealing and Colouring Slate Tiles

The reclaimed slate tiles were a different colour to the rest and the owner was keen to have them dyed to make the floor uniform, fortunately we access to an industrial stone colouring product and were able to apply this to darken the stone.

Slate Floor Restoration Adding Colour Slate Floor Restoration Adding Colour

The next step was to seal the slate floor and for this we applied a coat of Tile Doctor Colour Grow which seals and deepens the black colour of the Slate, the floor was left to dry fully and then we applied a further three coats of Tile Doctor Seal and Go to bring out more colour and add a low sheen.

Slate Floor Restored Final
 

Cleaning and Sealing Slate Tiled Floor in Royal Leamington Spa

Restoring a Kitchen Slate floor in Royal Leamington Spa Read More »

Terracotta Floor After

Removing Linseed Oil from Terracotta in Leamington Spa

This Terracotta floor in Leamington Spa had been sealed previously with Linseed Oil; apparently the tiler had dipped the Tile into the oil to make sure he had an even coverage. Linseed Oil is a traditional way of sealing terracotta however it makes the tiles significantly darker and over the years it becomes increasingly difficult to maintain.

Terracotta Floor Before Terracotta Floor Before

Cleaning Terracotta Tiles

To remove the oil and clean the floor we used a 50/50 mix of Pro-Clean and NanoTech Ultra-Clean, the strong cleaning power of the alkaline Pro-Clean mixed with the tiny abrasive particles in the Ultra-Clean combine together to make a powerful cleaning agent. We left the solution to dwell and soak into the tile for twenty minutes giving it time to break down the oil before working it in with a rotary buffing machine fitted with a black scrubbing pad. We then scrubbed and cleaned the grout lines by hand using stiff grout brushes and picked up the soiled cleaning solution using a wet vacuum. Last step was to rinse the floor down to remove any remaining chemical and effectively neutralise the floor before sealing; to do this we used a high pressure spinner tool which is an industrial system fitted into our van that delivers high pressure hot water to a lance whilst simultaneously removing the resulting water with a secondary suction action.

Terracotta Tile Sealing

We let the floor dry overnight and returned the next day only to notice that in a number of places linseed oil had dried on the surface to form some oil spots. These had to be removed before we began the sealing process so the spots were treated with a strong sealer remover product called Remove and Go and the floor was re-cleaned using an industrial steam vacuum.

We left the floor to dry again overnight and came back the third day to seal it, this time I’m pleased to say the floor was clear of the Linseed Oil and so we began to seal it using Tile Doctor Colour Grow which is a breathable colour intensifying sealer which brings out the natural colours in the tile surface as well as providing durable stain protection; Four coats were sufficient to seal the floor, it is a time consuming task however as you need to make sure the sealer has dried before applying the next coat.

Terracotta Floor After Terracotta Floor After

This job had taken three days and I had only quoted for two however we stuck to our original quote and only charged for the two days.

Terracotta Tiles Cleaned of Linseed Oil and Resealed

Removing Linseed Oil from Terracotta in Leamington Spa Read More »
Victorian Tile Floor Cleaned and Sealed

Church Floor Cleaned and Sealed

Victorian Tile Floor Cleaning

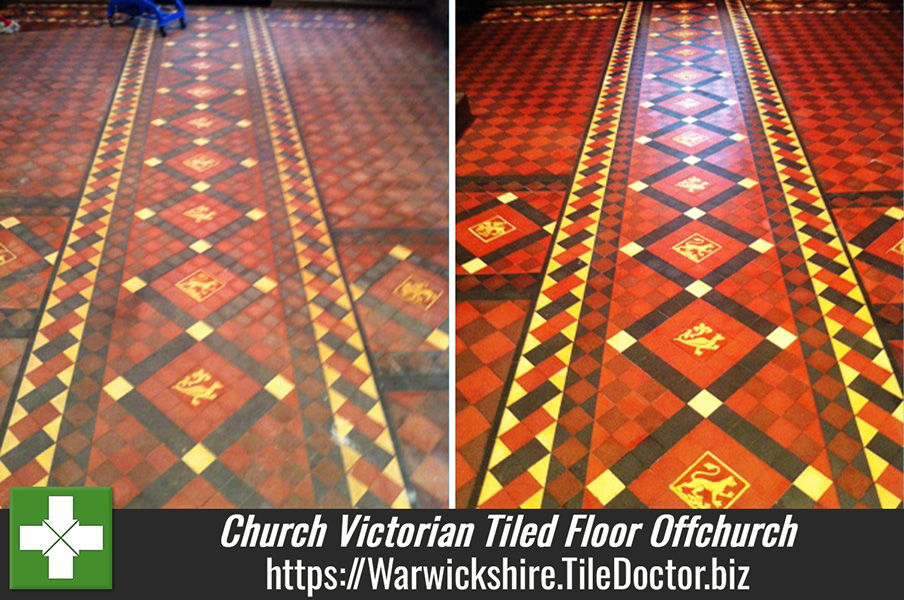
Pictures below from St Gregory’s Church located in the village of Offchurch Warwickshire. The Victorian floor was laid in the 1800’s, there were signs of damage from acid based cleaning and high foot traffic in the central areas, no doubt from years of use from the parishioners.

Victorian Church Floor before tile cleaning
Victorian Church Floor before Tile Cleaning

Tile Cleaning

We used Pro-Clean (diluted 1 to 5 with water) applied with a mop to the floor area then using a floor buffing machine fitted with a nylon scrub brush we proceeded to agitate the solution whilst scrubbing the floor in order to break down the soil.

The dirty solution was then vacuumed off the floor using a wet and dry vac machine followed by rinsing with clean water at low pressure to remove any left over soil and product.

Victorian Floor Tile Sealing

Victorian Tiled Church Floor after Tile Cleaning and Sealing

The next day the floor had small areas still drying which was speed dried using fans and hot air. We then sealed the floor using three to five coats of Seal and Go depending on the area.

Victorian Tile Floor Cleaned and Sealed
Victorian Tile Floor Restored

Victorian Tiled Floor cleaning by Tile Doctor Warwickshire.

Church Floor Cleaned and Sealed Read More »

Granite Worktop before and after cleaning and sealing

Granite Worktop

Adding Shine to a Granite Worktop

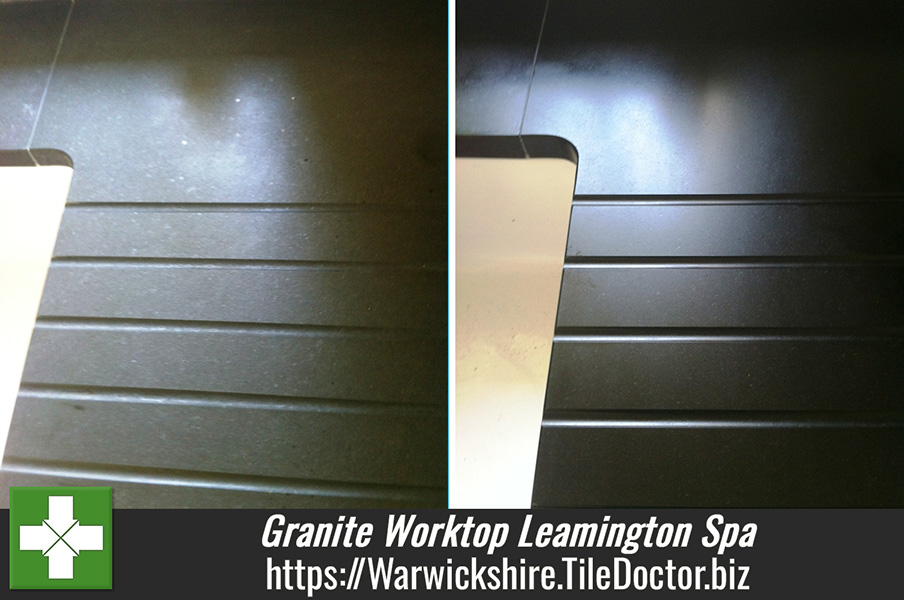
We don’t just clean tiled floors at Tile Doctor we also cover stone worktops including Marble and Granite. In the example below we were called to a customer near Leamington Spa who had tried a number of different products in order to achieve a glossy shine.

Granite Worktop showing a dull matt finish
Granite Worktop Before

We applied Tile Doctor Pro-Clean sprayed on to the work area to breakdown the previous products that had been applied.

Granite Worktop after being sealed
Granite Worktop After

The Granite worktop was high pressure steamed vacuumed and then left to dry before being sealed with an impregnating stone enhancer with extra darkening action which intensifies the natural colour and also masks defects and imperfections in the stone. The Granite was then buffed to get that real deep shine.

Granite Worktop Read More »
=================================

Warwickshire Tile Doctor

================================= Read More »
Scroll to Top