Work by Category

Warwickshire-Tile-Doctor

Welcome to my Work History archive where you will find detailed examples of Tile, Grout and Stone Cleaning and Renovation work carried out through Warwickshire.

To make things easier to find I have organised the posts by the most popular types of Tile and Stone. I also renovate other materials so if you’re looking for something else do get in touch as it’s highly likely we have the solution.

Popular requests include Ceramic Tile, Encaustic Cement, Fireplaces, Flagstone Pavers, Grout Cleaning, Limestone, Marble, Porcelain Tile, Quarry Tile, Sandstone, Slate, Terracotta Tile, Terrazzo Floors, Travertine, Victorian Flooring and Vinyl Floors.

Quarry Tile After Restoration

Kitchen Quarry Tile Restoration in Coundon, Coventry

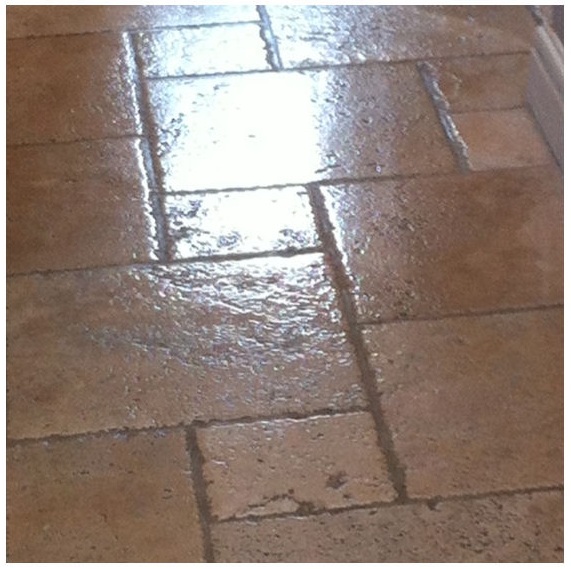
These Quarry tiles were in the kitchen of a house in Coundon, Coventry; the owner of the house found them hidden under a carpet and was keen to restore them. You can see from the photograph below they had been seriously neglected, covered in paint and cement and then finally carpet adhesive.

Restoring Quarry Tiles

First the quarry tiled floor was dry vacuumed to remove loose soil and particles from the surface. It was then cleaned using Tile Doctor Grout Clean-Up which is an acid based product useful for the removal of grout from the surface of the tile and in this case cement. The solution was worked into the tile using a buffing machine fitted with a black scrubbing pad. The soiled solution was removed using a wet vacuum and then rinsed with water; the process had to be repeated a second time before we were happy with the result.

Quarry-Tile-Before-Restoration
The next step in the cleaning process was to use a powerful industrial steam cleaner on the surface of the quarry tiles, as well as cleaning the steam had the added advantage of neutralising the floor before sealing.

Quarry Tile Sealing

The floor was now clean and the hot steam soon evaporated so it wasn’t long before we set about sealing the Quarry Tiles with four coats for Tile Doctor Seal and Go which combines stain resistance with a durable low-sheen finish.

Quarry-Tile-After-Restoration
Quarry Tiles after Restoration

Quarry Tiled Kitchen Floor Restored in Counden, Coventry

Kitchen Quarry Tile Restoration in Coundon, Coventry Read More »

Slate Hallway After Cleaning and Sealing

Removing Grout Haze from Slate Tile Flooring

You may remember a previous Limestone floor job we did for a Mrs Schwartz from Stourbridge, well true to her word she invited us back to clean and seal the slate tile flooring in her hallway which had been left with grout smears (aka grout haze) on the surface after tiling. Grout smears can be removed however if the floor is sealed it’s necessary to remove the sealer first.

Slate Hallway Before Cleaning

Cleaning Grout Haze off Slate Tile Flooring

To remove the sealer and clean off the grout smears we used a 50/50 mix of Tile Doctor Remove and Go combined with Nanotech Ultra-Clean for added effect, the solution was left to dwell on the surface of the slate for 15 minutes to break down the polymers in the grout. The next step was to turn on a high pressure spinner tool which is a very effective cleaning tool on its own; the water from the spinner tool also washes away any chemicals and neutralises the floor ready for sealing.

Slate Hallway Before Cleaning

Sealing Slate Tiles

We speed dried the slate tile flooring using a number of industrial fans and applied three coats of Tile Doctor Seal and Go which offers a good combination of stain resistance with a low sheen finish that brings out the natural colours in the slate.

Slate Hallway After Cleaning and Sealing Slate Hallway After Cleaning and Sealing


Cleaning and Sealing Slate Tile Flooring in Stourbridge

Removing Grout Haze from Slate Tile Flooring Read More »

Limestone Floor After Polish and Seal

Removing Marks from a Limestone Tiled Floor in Stourbridge

We often get called to sort out problems left behind by Tilers and this case was no exception. This Limestone tiled floor in the kitchen of a house in the historic town of Stourbridge had been sealed using a cloth and resulted in visible wipe marks being left behind in the top surface seal.

Removing the Sealer from Limestone Tiles

To resolve we had to cut back the surface using a set of twister burnishing pads, these diamond encrusted pads come in a number of different colours each one does a different job from scrubbing to polishing.

Limestone Floor Before Polishing Limestone Floor Before Burnishing

Polishing and Sealing the Limestone Floor

The next step was to re-seal the floor which was done using one coat of Tile Doctor Colour Grow which really brings out the colour in a stone floor. This was followed by the application of Tile Doctor Shine Powder which is a crystallising powder that leaves a very high shine and tough durable finish.

Limestone Floor After Polishing Limestone Floor After Polish and Seal

The job took a whole day to complete and the owner was so pleased with the results she left the following comments:

Mick was very professional and so enthusiastic about his work. He was genuinely determined to the very best job and has transformed our dull lifeless limestone floor. We are delighted with the results. Nothing was too much trouble for him and he went beyond our expectations. I have booked him in for next week to clean our slate hall floor. Excellent!

Mrs Schwartz, Stourbridge


Limestone Tiled Floor Restoration in Stourbridge

Removing Marks from a Limestone Tiled Floor in Stourbridge Read More »

Travertine Tiles After Cleaning

Cleaning Travertine in Stratford-upon-Avon

Travertine Cleaning in Stratford

We started the cleaning of a travertine floor in Stratford (that’s Stratford-upon-Avon in Warwickshire not East London where the 2012 Olympics are being held) using Pro-Clean diluted with water and a floor buffer fitted with a Scrubbing Pad and Grout Brush. For best results it’s best to leave the cleaning solution to dwell on the Travertine floor for five minutes before agitating and scrubbing, this allows the cleaner to penetrate the tile better and lift the dirt out of the floor.

Travertine Floor in Stratford-upon-avon Before Cleaning Travertine Floor Before Cleaning by Tile Doctor Warwickshire
Travertine Floor Before Cleaning

Travertine Floor Cleaning

The floor was rinsed down with clean water and the use of a high pressure floor spinner tool, before being cut back with a set of Twister burnishing pads finishing on the yellow polishing pad.

Travertine Tiles Before Cleaning Travertine Tiles in Warwickshire After Cleaning
Travertine Floor After Cleaning and Sealing

Travertine Floor Sealing

After the Travetine Cleaning the floor was left to dry before sealing with Tile Doctor Colour Grow, we then applied the last Green burnishing pad in the set to lock in the seal and remove any excess sealer from the surface of the tile. The last step was to use Tile Doctor Shine to give leave a durable high shine on the floor. The floor took a full day to clean, seal and re-polish.

The Customer, Mrs Gough was very pleased with the results and left the following comment on the Tile Doctor website:
Mick is a true professional who totally puts you at ease. It was a lot of money for me as I chose the most expensive package but worth every penny.

Travertine Tiled Floor Restoration in Stratford

Cleaning Travertine in Stratford-upon-Avon Read More »

Victorian Floor After Restoration

Victorian Tiled Floor in Erdington Birmingham

Victorian Floor in Erdington Birmingham

Details below of a Victorian Floor Resotration job in Erdington. The floor was soiled with dirt and paint spots and the owner wanted it restored back to its original beauty and preserved for the future.

Victorian Floor Before Restoration Victorian Floor Before Restoration
Victorian Tiled Floor Before Restoration

Cleaning the Victorian Tiled Floor

We used Pro-Clean mixed 50/50 with NanoTech Ultra Clean and hot water mopped on to the floor and left for 20mins to soak to help release the dirt. This was followed by scrubbing with a heavy floor buffer fitted with a black pad; we used a wet vacuum to pick up the solution from the floor and then rinsed with clean water and then steam vacuumed and speed dried with a fan blower.

Victorian Floor After Restoration
Victorian Tiled Floor After Restoration

Sealing the Victorian Tiled Floor

When dry the floor was sealed with 2 coats of Tile Doctor Colour Grow to bring out colour then one coat of Tile Doctor Seal and Go to add a shine. The jobs took two days in total, the photographs don’t really do the floor justice but the difference was remarkable.

Victorian Floor Restoration in Erdington Birmingham

Victorian Tiled Floor in Erdington Birmingham Read More »

Before and After photos of a Polished Limestone Floor Tiles

Limestone Floor Tiles Polished

Limestone Floor Tiles Polished to a deep shine

Great photograph below of a Limestone floor in the kitchen of a house near Coventry. The Limestone had lost it’s shine after the application of a surface sealing “Clean and Shine” type product; the problem was akin to the application of a wax finish which in turn had been contaminated with cleaning product and soil underneath. The grout line has also become heavily soiled through everyday use.

Cleaning Limestone Floor Tile

First the Limestone tiled floor was dry vacuumed to remove loose grit; we also took to opportunity to remove the kitchen unit kick boards. This was followed by a good clean with a 1:5 mix of Tile Doctor Pro-Clean which was left to dwell for 15 minutes before the application of a stiff grout brush on on the grout lines followed by the use of a slow speed buffing machine to break up the surface wax on the tile. The whole are was rinsed down using high pressure clean water via a spinner tool which removed any left over dirt from the grout lines.

The next step was to use the diamond encrusted burnishing pads system to prepare and condition the limestone floor tiles prior to polishing.

Before and After photos of a Polished Limestone Floor Tiles
Before and After

Adding that deep shine to Limestone Tiled Floors

We then applied Tile Doctor Shine Powder using a White buffing pad to provide that extra deep shine you can see in the photograph, it also provides and tough durable finish.

Limestone Tiled Floor Cleaning and Polishing

Limestone Floor Tiles Polished Read More »

Victorian Tile Floor Cleaned and Sealed

Church Floor Cleaned and Sealed

Victorian Tile Floor Cleaning

Pictures below from St Gregory’s Church located in the village of Offchurch Warwickshire. The Victorian floor was laid in the 1800’s, there were signs of damage from acid based cleaning and high foot traffic in the central areas, no doubt from years of use from the parishioners.

Victorian Church Floor before tile cleaning
Victorian Church Floor before Tile Cleaning

Tile Cleaning

We used Pro-Clean (diluted 1 to 5 with water) applied with a mop to the floor area then using a floor buffing machine fitted with a nylon scrub brush we proceeded to agitate the solution whilst scrubbing the floor in order to break down the soil.

The dirty solution was then vacuumed off the floor using a wet and dry vac machine followed by rinsing with clean water at low pressure to remove any left over soil and product.

Victorian Floor Tile Sealing

Victorian Tiled Church Floor after Tile Cleaning and Sealing

The next day the floor had small areas still drying which was speed dried using fans and hot air. We then sealed the floor using three to five coats of Seal and Go depending on the area.

Victorian Tile Floor Cleaned and Sealed
Victorian Tile Floor Restored

Victorian Tiled Floor cleaning by Tile Doctor Warwickshire.

Church Floor Cleaned and Sealed Read More »

Slate Floor After Tile Cleaning and Sealing

Triumph Club Slate Tile Cleaning and Sealing

Slate Tile Cleaning and Sealing at the Triumph Working men’s club

It’s often difficult for a set of photographs to capture the difference cleaning and sealing a stone floor can make, however I think you will agree the photographs below which were taken at the Standard Triumph working men’s club in Coventry show an amazing transformation.

The slate floor had one coat of sealer put down by the tiler some ten years ago and due to the nature of the environment it had been covered in drink spills and the resulting cleaning products, overtime this had made floor sticky and dull.

Slate Floor before Tile Cleaning
Slate Floor before Tile CleaningSlate Floor Before Tile Cleaning  

Slate Tile Cleaning Process

The first step in the Slate Tile Cleaning process was to get it completely clean and free of any residual chemicals, we did this with the application of Tile Doctor Pro-Clean (a strong 1/2 mix with water) which we left to dwell for 15 to 20 minutes allowing it to chemically soak into pores of the slate tile. We then scrubbed the floor with a heavy weight floor buffer allowing the scrubbing action to break the soil down, we worked the soil and grout lines four square metres at a time, removing the soiled water with a wet and dry vacuum. The slate floor was then washed down with cold water applied at a pressure or 1200 psi with a special Spinner Tool. The whole tile cleaning process took around 8 hours to complete.

An inspection of the cleaned slate floor revealed ten years of wear and tear had resulted in a few holes which we repaired before leaving the floor to fully dry overnight.

Slate Floor After Tile Cleaning and Sealing
Slate Floor after Tile Cleaning and Sealing 

Sealing the Slate Tile

The next day we coated the floor with 5 coats of a Tile Doctor Seal and Go which is a water based sealer ideal for Slate floors that provides stain resistance and a durable low-sheen finish. Sealers do break down over time and given the high foot traffic over this floor we have agreed to go back once a year to provide a tile cleaning and sealer top up.

Triumph Club Slate Tile Cleaning and Sealing Read More »

Limestone Floor After Restoration

Limestone Floor Restoration

Limestone Floor Restoration

Some photographs below of a Limestone floor in a property in the West Midlands. The property had just been sold and the new owners wanted the Limestone floor, which was heavy damaged from pets and the application of the wrong cleaning products, restored back to its original condition. Owners of stone floors really need to take care not to use acidic products to clean their floors as this slowly eats away at the stone; you get the same problem from pet urine which contains Uric acid.

Limestone floor before restoration by Tile Doctor Warwickshire
Limestone floor before restoration

I cleaned the floor using Tile Doctor Pro-Clean along with the diamond coated burnishing pad system and then sealed with Tile Doctor Colour Grow which is great for bringing out the colours in stone.

Limestone Floor After Restoration

After sealing we polished the floor with Tile Doctor Shine which is a crystallising powder that provides a very high deep shine and tough durable finish.

Limestone Kitchen Floor After Restoration

All in the entire Limestone Floor restoration took two long 12 hour days however our efforts were rewarded by the look on the faces of the new owners who were over the moon with the finished job.

Limestone Floor Restoration Read More »

=================================

Warwickshire Tile Doctor

================================= Read More »

Scroll to Top